
Your washing machine is an asset.
And when it breaks down for whatever reason, the day is already a hundred times more difficult, isn’t it?
It doesn’t matter what day it is, there’s never a good time to have a broken-down washing machine standing there in front of you.
But there are different practical ways you can fix your broken washing machine and keep it functioning properly for many more years to come.
So how is that possible?
Here’s an extensive guide to talk about that in detail.
Introduction
Every machine has one thing in common – they eventually malfunction.
Washing machines are prone to unconditional malfunctions and problems.
But if you understand the ins and outs of washing machines, chances are, you will be able to keep it running properly for a long time but also repair it on your own when the need arises.
However, since washing machines are of many different types, it’s important to start from the very beginning.
Types of Washing Machines
Most washing machines that you come across have the same use. However, they differ in terms of design and functionality.
Here are the different types of washing machines you may see:
1. Top-Loading Washing Machines
One of the most traditional types of washing machines, top-loaders have been a staple in households for decades.
These machines feature a vertical drum where clothes are loaded from the top.
The agitator, a central column, moves clothes around for effective cleaning.
Top-loading machines are known for their simplicity, affordability, and faster washing cycles. However, they tend to use more water and energy compared to front-loaders.
2. Front-Loading Washing Machines
Over the years, front-loaders have been recognised for their efficiency and water-saving capabilities.
Front-loading washing machines feature a horizontal drum, and clothes are loaded from the front.
Front-loading washers also use less water, detergent, and energy, making them more environmentally friendly and cost-effective in the long run.
Additionally, they provide better cleaning performance and are known for gentler clothes handling. However, they often come with a higher initial price tag.
3. High-Efficiency Top-Loading Washing Machines
Combining the convenience of top-loading with the efficiency of front-loading, high-efficiency top-loaders are designed to use less water and energy.
These machines typically lack an agitator, relying on drum movements to clean clothes.
While they are more energy-efficient than traditional top-loaders, they might have longer cycle times and a higher upfront cost.
4. Compact Washing Machines
These machines are one of the most budget-friendly and space-friendly options for households.
Ideal for smaller living spaces or individuals with limited laundry needs, compact washing machines are a space-saving solution.
They come in both top-loading and front-loading designs and are known for their portability.
Despite their smaller size, many compact machines offer impressive features and efficiency, making them a practical choice for those with space constraints.
5. Portable Washing Machines
Perfect for individuals living in apartments or temporary housing, portable washing machines are compact, lightweight, and can be easily moved.
These machines are manually operated, requiring users to fill and drain water manually.
While they may not have the same capacity as larger machines, they are a convenient option for those seeking a portable and budget-friendly solution.
6. Smart Washing Machines
With the rise of smart technology, washing machines have joined the league of connected appliances.
Smart washing machines can be controlled remotely via smartphone apps, allowing users to start, stop, or monitor the washing process from anywhere.
Some models even have sensors that automatically adjust water and detergent levels based on the load.
While these machines offer convenience, they often come with a higher price tag.
Common Washing Machine Problems
Now that you have an understanding of what kind of washing machine you own, it’s important to understand how you can fix it when the need arises.
Even though the structure of washing machines can vary from machine to machine, most of them are fixed in a very similar way.
Let’s now explore some of the problems you might face with your washing machine.
1. Washing Machine Not Draining Properly
Common Causes:
- Clogged drain hose or filter
- Faulty drain pump
- Problems with the lid switch or door latch
Symptoms:
- Standing water in the drum after the cycle
- Unpleasant odours due to stagnant water
- Error codes indicating drainage problems
Possible Solutions:
- Clean the drain hose and pump filter regularly
- Check the lid switch and door latch for proper functioning
2. Excessive Vibrations Or Unusual Noises

Common Causes:
- Uneven load distribution
- Worn-out drum bearings
- Damaged shock absorbers
- Levelling issues
Symptoms:
- Loud banging or grinding noises during the operation
- Visible movement or shaking of the machine
- Vibrations that can be felt throughout the room
Possible Solutions:
- Ensure an even distribution of clothes in the drum
- Check for worn-out drum bearings and replace them if necessary
- Ensure the washing machine is properly levelled
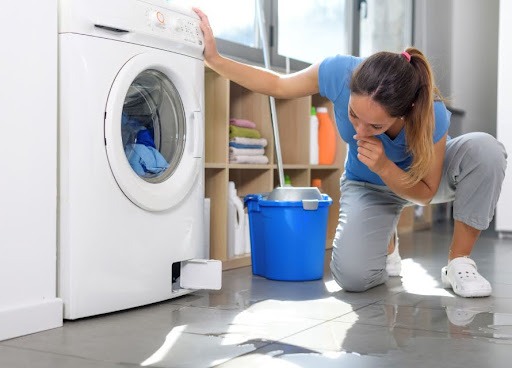
3. Leaking Water
Common Causes:
- Damaged door seal or gasket
- Faulty water inlet valve
- Loose hose connections
Symptoms:
- Puddles of water around the washing machine
- Damp (or wet) clothes after the cycle
- Visible water leaks during operation
Possible Solutions:
- Inspect the door seal or gasket for tears or damage (and replace it if necessary)
- Check hose connections and tighten if necessary
- Examine the water inlet valve for leaks and replace if needed
4. Washing Machine Not Spinning
Common Causes:
- Broken or worn-out drive belt
- Faulty motor coupling
- Malfunctioning door switch
Symptoms:
- Clothes remain soaking wet after the cycle
- Unusual noises during the wash or spin cycle
- Lack of movement in the drum
Possible Solutions:
- Replace a broken or worn-out drive belt
- Check and replace a faulty motor coupling
- Inspect the door switch for proper functionality
5. Foul Odours Coming From the Washing Machine
Common Causes:
- Residue buildup in the drum or detergent dispenser
- Mold or mildew growth
- Using too much fabric softener
- Washing in low-temperature settings
Symptoms:
- Unpleasant odours emanating from the washing machine
- Musty-smelling clothes after washing
- Visible mould or mildew in the drum or gasket
Possible Solutions:
- Run a hot water cycle with vinegar to clean the drum and eliminate odours
- Wipe down the gasket, door, and detergent dispenser regularly
- Use the recommended amount of fabric softener
- Occasionally wash in higher temperature settings to prevent mould and mildew growth
Regular maintenance and prompt identification of washing machine problems can extend the lifespan of your appliance and save you from costly repairs.
The more you understand about your machine, the quicker you can fix most common problems on your own.
But if you encounter complex issues or are unsure about the diagnosis, it’s always wise to consult with a professional technician to ensure the longevity and optimal performance of your washing machine.
Tools and Equipment for Washing Machine Repair
Maintaining and repairing your washing machine doesn’t have to be a daunting task, especially when you have the right tools and equipment at your disposal.
Here’s what you will typically need:
1. Screwdriver Set
A dynamic, multi–functional screwdriver set, is a must-have for any DIY enthusiast.
Washing machines often have screws securing various panels and components.
It’s important to have a good quality set of screwdrivers with both flathead and phillips-head screwdrivers to ensure you’re equipped for any task.
2. Multimeter
Electrical issues are a common culprit in washing machine malfunctions.
A multimeter allows you to measure voltage, resistance, and continuity, helping you identify and troubleshoot electrical problems accurately. This is most often used to test whether the components within your appliance are working properly.
3. Adjustable Wrench
This tool is indispensable for tightening or loosening nuts and bolts.
From securing water supply lines to adjusting levelling feet, an adjustable wrench is a fundamental component of your repair toolkit.
4. Pliers
Pliers come in handy for gripping, bending, and cutting.
Needle-nose pliers are particularly useful for reaching tight spaces, while slip-joint pliers provide a strong grip for various tasks, including hose clamp adjustments.
5. Bucket and Towels
Water leaks are common issues in washing machines.
Having a bucket and towels nearby can help contain and clean up water spills, ensuring a mess-free repair experience.
6. Socket and Ratchet Set
For tasks that involve nuts and bolts, a socket and ratchet set is essential.
This set simplifies the process of tightening or removing bolts in hard-to-reach places.
7. Flashlight
Many washing machine components are tucked away in dark corners.
A reliable flashlight is crucial for illuminating these areas, allowing you to easily inspect and identify issues.
8. Pipe Wrench
Dealing with water supply or drainage issues?
A pipe wrench is designed to grip and turn pipes, making it a valuable tool for plumbing-related repairs.
9. Washing Machine Manual
While not a physical tool, having the manual for your specific washing machine model is invaluable. It provides essential information about parts, troubleshooting, and maintenance specific to your appliance.
10. Safety Gear
Protect yourself with safety gear such as gloves and safety glasses.
Working with electrical components and moving parts requires caution, and the right gear can prevent accidents.
Precautions Before Repairing a Washing Machine
A common washing machine problem will likely tempt you enough to start repairing it on your own.
But before you roll up your sleeves, it’s important to take care of safety measures too.
Here are the precautions that you should take:
1. Safety First
Prioritise your safety first.
Unplug the washing machine from the power source to eliminate the risk of electric shock.
Water and electricity are a dangerous combination, so it’s crucial to ensure the appliance is completely disconnected before proceeding with any repair work.
2. Understand The Basics
Not all washing machine issues are easily fixable.
Starting your repair without having a proper understanding of the problem can worsen the situation.
Take the time to diagnose the issue accurately by referring to the appliance’s manual or seeking guidance from reliable online sources.
Identify the specific components involved in the problem and research potential solutions.
3. Gather the Right Tools
Equipping yourself with the right tools is essential for a successful repair.
A basic toolkit for appliance repairs should include screwdrivers, pliers, wrenches, and a multimeter for electrical testing.
Having the correct tools on hand will save you time and frustration during the repair process.
4. Use Genuine Parts
There will be instances when certain parts of your washing machine may require a replacement.
Using subpar or incompatible parts can lead to further damage and compromise the efficiency or safety of your washing machine.
Ordering the correct parts ensures a proper and long-lasting fix.
5. Check For Warranty
Before attempting any repair, check if your washing machine is still under warranty.
Tampering with the appliance yourself might void the warranty.
It’s always advisable to consult the manufacturer or a professional technician if the washing machine is still covered.
Now that you understand the precautions you need to take before repairing your washing machine, let’s dive into some common problems that you may encounter with your machines.
Fixing a Washing Machine With a Blocked Filter
The washing machine filter is an important part that prevents lint, debris, and other foreign particles from entering the drainage system.
However, with time, these filters can become clogged. This hinders the machine’s ability to drain properly.
A neglected filter not only compromises washing machine performance but can also lead to foul odours and even damage to the appliance.
Even though it’s simple to clean your washing machine filter, and it improves its efficiency, most people either forget about it or don’t know how to do it at all.
Materials You'll Need To Clean Your Filter
- A Screwdriver – To remove the access panel on most washing machine models.
- Bucket or Towels – Placing a bucket or towel under the filter area will help contain any water that may spill during the cleaning process.
- Cleaning Solution – A mixture of warm water and mild detergent or vinegar will effectively break down and remove any accumulated residue.
- Old Toothbrush or Soft Brush – Using a brush will help dislodge stubborn debris from the filter mesh without causing damage.
Step-by-Step Guide to Cleaning Your Washing Machine Filter
Note: Before starting the cleaning process, it’s essential to consult your washing machine’s user manual for specific instructions and safety precautions.
Step 1: Power Off and Unplug Your Washing Machine
As we mentioned earlier, safety is your #1 priority.
Before you start the repair, turn off your washing machine and unplug it from the electrical outlet.
This will prevent any electrical accidents during the cleaning process.
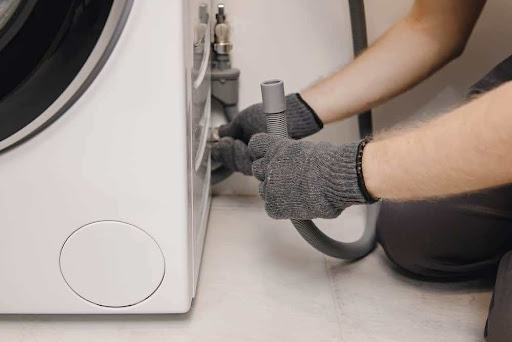
Step 2: Locate the Filter Access Panel
Your manual explains your washing machine better than any picture on the internet ever would.
Refer to your washing machine’s user manual to identify the location of the filter access panel.
In most cases, it is situated at the front or rear of the machine. Use a screwdriver to remove any screws securing the panel in place.
Step 3: Place a Bucket or Towels Beneath the Filter Area
Cleaning the filter area also means that there are spills during the process.
Position a bucket or towel under the machine to prevent leaks or spillage.
Step 4: Remove the Filter Cover
Once the access panel is removed, the next step is to locate the filter cover.
Use your screwdriver to loosen any screws securing the cover, and then carefully remove it.
Step 5: Empty the Drainage System
Before tackling the filter itself, allow any standing water to drain into the bucket or be absorbed by the towels.
This will minimize mess and make the cleaning process more manageable.
Step 6: Remove and Clean the Filter
The next step is to detach the filter from its housing. Inspect it for visible debris, such as lint, hair, or foreign objects.
Use an old toothbrush or soft brush to scrub away any residue, paying close attention to the mesh or perforated surface.
Step 7: Soak the Filter in a Cleaning Solution
Prepare a solution of warm water and mild detergent or vinegar.
Submerge the filter in this solution for a thorough cleaning. Allow it to soak for at least 15-20 minutes to break down any stubborn residue.
Step 8: Scrub Away Stubborn Debris
After soaking, use the brush again to scrub away any remaining debris.
Be thorough but gentle to avoid damaging the filter. The toothbrush can be handy for intricate areas, such as the mesh.
Step 9: Rinse the Filter
Once you’ve scrubbed the filter, rinse it thoroughly under running water.
Ensure that all cleaning solutions and loosened debris are completely washed away.
Step 10: Reassemble the Filter and Cover
After cleaning and rinsing the filter, place it back into its housing. Reattach the filter cover and secure it with the screws you removed earlier.
Step 11: Replace the Access Panel
Once you’ve confirmed that there are no leaks and the machine is functioning correctly, replace the access panel and secure it with the screws.
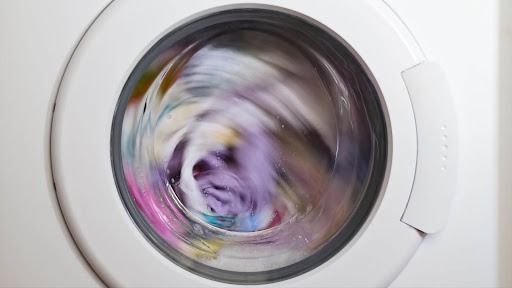
Fixing a Washing Machine That Doesn’t Spin Properly
Most times, a washing machine which won’t spin properly could have a minor issue that’s solvable easily with a little bit of effort.
Other times, the problem could also be complicated, which requires professional assistance.
Either way, it’s always better to try fixing an issue like this on your own.
Let’s explore the common reasons behind a washing machine that isn’t spinning properly and provide practical solutions to get your appliance back in working order.
1. Your Washing Machine Has An Imbalanced Load
Lack of even distribution in your machine is something that could lead your machine not to spin properly.
The machine’s sensors may prevent it from spinning to avoid damage.
To resolve this issue:
- Rearrange the Load
- Use a Level Surface
- Stick to the manufacturer’s weight recommendations
2. Faulty or Worn Drive Belt
The drum belt of your machine transmits the power from the motor to the drum of the machine.
Regular wear and tear can cause it to get damaged.
To address this problem:
- Inspect the Drive Belt for cracks or frays
- Tighten or Replace the Belt
3. Lid Switch Problems
The lid switch on top-load washers is a safety device that stops the washer from spinning when the lid is raised.
These switches ensure the machine won’t spin if the lid is open.
However, if the switch is faulty or not engaging properly, it can lead to spinning issues. To fix this issue:
- Check the lid switch for any visible damage
- Replace the lid switch, if required
4. Clogged or Faulty Drain Pump
A clogged or malfunctioning drain pump can impede the draining process, leading to spin problems.
If water is not expelled properly from the washing after every wash, the machine won’t be able to spin efficiently.
Here’s how to tackle this issue:
- Inspect the drain pump for debris, lint, or foreign objects obstructing the pump
- Clean the pump thoroughly
- Test the drain pump
5. Electronic Control Board / PCB Issues
The electronic control board of your machine is the component that governs the functions of the washing machine, including the spinning cycle.
However, common problems in this board will also lead to problems like your machine not spinning properly or drum problems in your machine.
- Check for Error Codes
- Reset the Control Board
- Check for black burnt marks
Even though it may seem tempting for you to perform most repairs on your own, there are also certain cases when you’d need a professional to do the repair for you.
Let’s now explore when it’s time to hire a professional to repair your washing machine.
When to Hire a Professional?
While some types of washing machine repairs can easily be tackled successfully with a bit of research and effort, there are situations where calling a professional technician is not just advisable but essential.
Here’s when you should be hiring a professional:
1. Safety Concerns
Any electrical or structural issues require you to pay utmost attention to safety.
In any case, if you find any exposed wires, flickering lights, or strange odours, make sure you’re seeking professional technical assistance.
Attempting to fix complex electrical problems without the necessary expertise can lead to serious injuries or even fire hazards.
2. Complex Plumbing Problems
Any leaky faucet in your machine or a clogged drain could seem easily manageable for a DIY enthusiast.
But complex issues like burst pipes or sewage backups require professional assistance.
These situations can cause extensive damage to your property if not addressed promptly and correctly.
3. Complex Appliance Repairs
Most appliances also undergo such problems that aren’t noticeable to an average household owner.
Appliances such as washing machines, or ovens can easily start malfunctioning.
It’s important to call in a professional if you notice a problem with your appliance which is beyond your understanding.
4. Parts Malfunctioning and Error Codes
There will also be instances when certain parts of your washing machine stop working.
In some instances, the fuse could get blown.
Even error codes may mean that either something is wrong with your machine or maybe you need new sensors.
What you think are minor squeaks are actually internal stripped or corroded mechanisms that need replacing.
That’s where you need to let professionals do their job.
Conclusion
A thorough washing machine repair, once done, can keep your appliance working well for a long time.
By following the steps outlined in this guide, you can keep your machine healthy for a long time.
But if you’re still not able to find a solution to your problem, it’s advisable to seek professional help.
And what better way than to seek help from Georgi’s Services?
You can book an appliance repair in North or East London by simply contacting us directly at 07729 435106 and we would love to help you.
We highly recommend checking out our prices too.
And if you need a washing machine repair, you can contact us right away.